Friday, May 6, 2016

Purchase local or indigenous materials

Using locally-produced materials has multiple advantages. It reduces the fossil fuels and associated pollutants, including greenhouse gas emissions, required for shipping. It supports local businesses and feeds money into the regional economy. And one of the beauties of landscaping with local materials is that they seem to belong and enhance the region’s unique sense of place.

What constitutes “local” varies to some extent, depending on the type of material. The heavier the material, the more energy it consumes and the more pollutants emitted during transport, and therefore the closer the source should be. The Sustainable Sites Initiative™ recommends the following guidelines:
  • Crushed concrete and other aggregates used as a foundation for paths and driveways should be extracted, recovered, or manufactured within 50 miles of the site
  • Compost and other soil amendments should come from within 50 miles of the site
  • Plants should be grown at a facility within 250 miles of the site
  • All other materials should be extracted, harvested, recovered, and manufactured within 500 miles of the siteExamples of local materials
Local landscape architecture firms which have pursued LEED® certification from the U.S. Green Building Council or follow the Sustainable Sites Initiative criteria have likely conducted research and can recommend local materials. Other potential resources include local nurseries or garden centers.

Stone wall constructed from materials found on-site. Image credit: Philip Hawkins, Wildflower Center staff

Decomposed granite trails at the Lady Bird Johnson Wildflower Center. The d.g. is the by-product of granite mining and comes from a local quarry. Image credit: Heather Venhaus

Source: http://landscapeforlife.org/materials/purchase-local-or-indigenous-materials/

Water-Saving Tips For The Lawn And Garden

As a gardener, I know the challenges of keeping both your garden plants and lawn looking their best. This can be especially difficult if you live in a region where water is scarce or heat is a factor, as I do. So how do you maintain a healthy landscape in such extremes? Simple. You need to practice a few water-saving tips along with the right tool for the job.

When you begin a garden or landscape design, it’s important to plan carefully. Don’t jump the gun and start planting whatever you like simply because it’s pretty. After all, looks will fade in time, especially when not suited for the area you put them in. So do your research and choose native plants for your region as well as drought tolerant ones that don’t require as much watering. Don’t forget the mulch – this will greatly reduce your watering needs, as it helps retain moisture.

Likewise, choose your planting area wisely. If your garden is located in full sun, you’ll need plants that are adapted for intense heat. Wind-prone areas rely on plants that handle both the harsh swaying and drier conditions. And whenever possible, use those shady areas. There are many plants that tolerate shade and look good too. Even better, they generally require less watering. When it comes to your lawn, look at its size. If you have a large expanse of unused grass, which requires a lot of water, consider dialing it down some by substituting with other alternatives like drought tolerant ground covers or even hardscape.
Advertisement

To make the most of irrigation in the landscape whenever you do water, opt for early morning to prevent moisture loss through evaporation. Of course, sometimes that’s not possible so late afternoon works in a pinch. But avoid sprinklers, as these rarely penetrate the ground. Instead, use soaker hoses if you can. In lieu of this, a good, water efficient hose will do, watering deeply. Get rid of that leaky, water squirting hose you’ve had for years. You might want to consider using a retractable hose reel too.

I’m not a big person, so lugging around a long, heavy water hose is too much of a chore. Using a retractable hose reel, like that from Hoselink, solves this problem. They’re easy to manage, they look better (no messy hose laying around) and no kinks to worry with. These durable hose reels mount easily where you need them and stay there. And the retractable hoses lock in place when you’ve reached your spot, but continue on with a slight tug as you move further on. And when you’re finished, there’s an automatic rewind – no more dragging or winding the hose up.

Best of all, there’s more than one retractable hose reel to choose from depending on your specific watering needs. So with a few simple watering tips and the right tool, maintaining a healthy lawn and garden is more than possible!

Flex Your Green Thumb with These 7 Garden-centric Projects

Looking to add a little life to your yard? These projects are all simple and can give your landscape a more sustainable and visually charming appeal. Give one (or more) a try and enjoy the results for years to come!

Rain Barrels

Every garden needs to have a source of water, and what better way to help your garden thrive than by using the water that Mother Nature already supplies.
The simplest rain barrel can be built and installed for around $50. Pick up a sturdy, plastic trash can, enough fiberglass window screening to cover the top of the can, and an outdoor faucet. You will also need something sturdy for your rain barrel to sit on, but a couple cinder blocks will work just fine.
To attach the faucet and keep it from leaking, you will need two metal and two rubber washers. Use a conduit lock nut to screw the faucet into place.
Cut a hole 2 inches up from the bottom of the can, big enough to fit the back of the faucet through. The order of the washers is important: metal washer, then rubber washer. Thread the faucet through your opening and add one rubber washer and the last metal washer. Tighten down the lock nut and your faucet is ready.
Fit the screen on top of the can and secure it either with staples or a giant rubber band. This will keep mosquitoes and debris from getting into your collected rainwater.
The lid needs to be cut to accommodate your downspout. Place the lid back on the can, position under the downspout, and you are done.
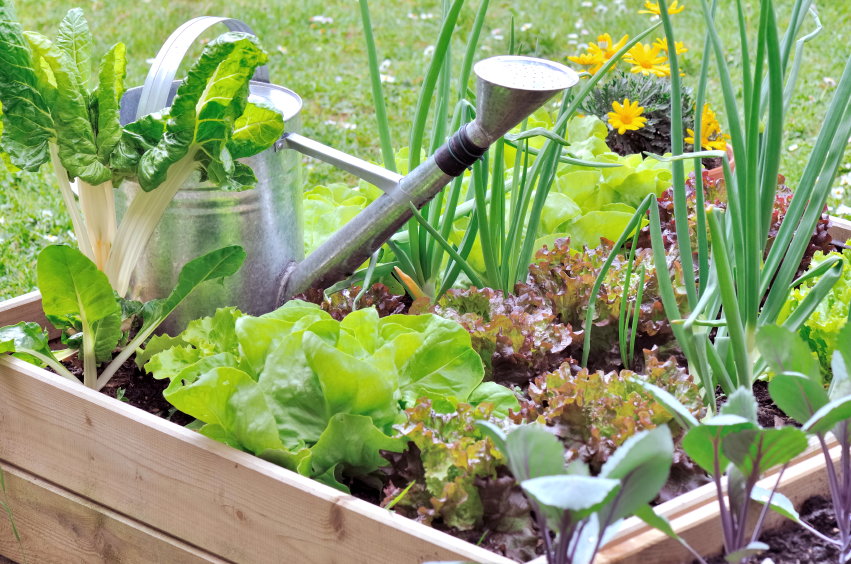
raised garden with lettuce

Raised Garden Bed

Now that you have your water source, you can build your raised garden bed. A raised garden bed is attractive and adds function to your landscape.
The easiest plan is simply using landscape timbers. They can be made into a square or any shape you want that has flat sides.
Plan where you want them by placing the first level of timbers. If you want them four or more timbers high, you have to drill holes 4 inches from the ends of each timber, making sure the holes all line up. Now pound a piece of rebar through the holes and into the ground. Voila, the beds are done.

Cement Stepping Stones

How about making your own cement paver stepping stones that lead to your new garden beds? All it takes is a couple bags of ready cement, some water, a container to mix the cement in, and some forms.
Forms can be purchased just about anywhere these days. The least expensive are a simple plastic that you simply fill with mixed cement and let dry. Once dry, flip out the stepping stone and make your path.

Solar Path Lighting

To add a little pizazz to your stepping stones, complement them with solar path lights. They come in sets or single applications. Most also come with a stake. Lighting a path has never been so easy. Nowadays you can even get them with LED lights that are brighter, last longer, and are more environmentally friendly.
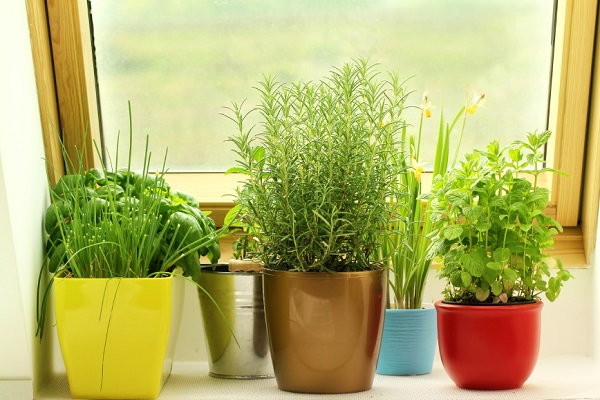
herbs in pots by window

Container Herb Gardens

Herbs taste wonderful when they've been freshly cut, and actually grow better when cut often. You can mix and match different herbs in one container too, so it makes them attractive to the eye and your taste buds. I tend to plant perennial herbs separate from annuals. Basil and thyme make a good pairing.
Herbs do not like soil that is packed too tight, so add some small bark pieces into the soil before planting. There are some containers that are made especially for herbs. Plastic is better, as the soil won’t dry out as fast as clay pots tend to.

Freshly Planted Trees

So now that you have your herb garden planted, how about adding a tree (or two) to the yard?
Keep in mind whether the sapling will be in the sun or shaded by an older tree, and check for any electrical wires that may eventually get in the way when the tree reaches its full potential. Also, check with your local Diggers Hotline to check where it is safe to dig. Check the soil for acidity/alkalinity and make the proper adjustments with additives.
The hole must be two to three times the diameter of the longest branches of the tree. It should only be as deep as the root ball. Also, when digging, try to form the hole into a cone-like shape to prevent the tree from leaning when planed.
Take the tree out of its container or burlap only when you are sure you are ready to plant. You do not want the roots to dry out or get damaged waiting to be planted. Place the root ball over the cone and measure to make sure the hole is not too deep. Where the trunk turns into root should be level with the top of the hole.
Backfill the hole about half way and tamp down with your hand gently. Add some water to get the air pockets out, and then finish filling the hole. Water thoroughly every day for the first couple of weeks, and then about once a week. A slow trickle of water is best as to allow water ample time to travel to the roots.

Seed Bombs

Now your yard is perfect, but the land next to yours is vacant and needs some attention, what can you do? Seed bombs are the perfect answer.
You will need some clay from your area. If that isn’t available, you can purchase art clay from a hobby store. You will also need some seeds (preferably seeds that are indigenous to your area) and some compost. Mix 5 parts clay with 1 part compost and 1 part seeds.
Carefully add drops of water until it is just enough so that when kneaded the mixture can be formed into balls about the size of a golf ball. Let them dry overnight. Toss them into the vacant lot and soon it will be full of flowers.
The idea behind the ball is to protect the seeds from birds, give them enough time to germinate, and have the nutrients they need to grow right in their own little world of the seed bomb.

Source: http://www.doityourself.com/stry/flex-your-green-thumb-with-these-7-garden-centric-projects

The Top 3 Rules For Tree Care

1. Water
2. Water
3. Water

Soaker hose around tree
The Snip-n-Drip Soaker System is an easy and effective way to water trees.
WHEN dry weather continues for an extended period, landscape trees depend on homeowners for water. According to the Texas Forestry Service, more than 5 million urban and landscape trees in Texas alone have been lost due to drought, so it's important to take care of surviving trees and nurture replacement trees with proper watering.
The amount of water a tree needs depends on many factors, including the age and species of the tree, the time of year, weather and soil type. As a rule, newly planted and young trees require more frequent watering than older, well-established trees. But during extended periods of drought, all trees benefit from supplemental watering.
According to Skip Richter, County Agent with the Texas AgriLife Extension Service in Houston, during periods of drought, "the goal is to provide just enough supplemental irrigation to maximize growth on young trees and to keep older, established trees healthy. We don't want to water so much or so often that we encourage more canopy growth than the soil, climate and tree species can support during normal rainfall years. Excessive watering can make a tree dependent on irrigation rather than resilient enough to survive on what nature normally provides."

Watering Newly Planted Trees

Newly planted tree
For the first several months after planting, most of the tree's roots are still within the original root ball.
For the first several months after planting, most of a tree's roots are still within the original root ball, with some roots beginning to grow beyond this area. The root ball and the surrounding soil should be kept evenly moist to encourage healthy root growth. After a few months, expand the watering zone to cover the entire area under the canopy. It can take two or more growing seasons for a tree to become established — for roots to venture into the soil well beyond the planting hole. It's vital to provide supplemental moisture in those early years, if nature doesn't provide regular soaking rains. During hot, dry weather, new trees may require water as often as three times per week to ensure that the root ball doesn't dry out.

Watering Established Trees

Established trees
Once a tree is established, apply water in a wide band around the outer reaches of the tree's canopy, called the dripline.
It's a common misconception that a tree's roots are a mirror image of the aboveground canopy. In reality, an established tree's roots usually extend well beyond the edge of the canopy, or drip line. Although some anchor roots may reach deep into the soil, most tree roots are concentrated in the upper 12" to 18" of soil. When watering established trees, provide a deep, soaking irrigation to the entire area beneath the tree canopy and extending several feet beyond the drip line. Ideally, you should moisten the soil to a depth of 10" each time you water. To prevent rot, don't apply water to the area directly around the trunk.

Know When to Water

The easiest way to check soil moisture is to take a long (8"-plus) screwdriver and poke it into the soil. It will pass easily into moist soil, but be difficult to push into dry soil. If you can't poke it in at least 6", it's time to water. This technique works best in clay and loam soils.

How to Apply Water

Overhead sprinklers are the easiest way to cover large expanses, but they're inefficient, losing up to half the water to evaporation. Trees are better served by watering methods that apply water slowly, right at soil level. It may take several hours to properly water a single mature tree.
Soaker hose
A soaker hose, such as the one in our Snip-n-Drip Soaker System, applies water slowly so it soaks in rather than running off.
Soaker hoses are an efficient way to water trees because they're porous and release water slowly. Encircle a tree with a spiral of soaker hose and run it for an hour or more — as long as it takes for water to penetrate 6" or 8", using the screwdriver test.
A Pressure Regulator improves the efficiency and prolongs the life of soaker hoses.
Bubblers are hose-end devices that reduce the velocity of the water, so it soaks in rather than running off. Because it waters one spot at a time, you'll need to move the bubbler around.
Our Garden and Landscape Sprinkler System has ground-level sprinklers suitable for watering trees.
If possible, avoid watering during the hottest part of the day — 10 a.m. to 6 p.m. — to conserve water.
Rain barrel
To water two or more small trees at once, use the 4-Port Deluxe Rain Barrel as a reservoir. Fill it with water, and run a separate hose to each tree.

Frequently Asked Questions

How much water does my tree need?
As a general rule of thumb, apply an inch of sprinkler irrigation or enough water to moisten the soil to a depth of 10" or more for mature trees. A common mistake is to apply frequent shallow waterings that don't soak deeply into the soil.
My irrigation system waters my lawn regularly. Isn't that enough for my trees?
Probably not. Most irrigation systems are programmed to apply frequent, shallow waterings. Trees do better with less frequent but deeper soakings — a heavy soaking once a week is much better than a shallow watering every few days. That's because shallow waterings encourage tree roots to remain near the soil surface where they're prone to drying out. Watering deeply, on the other hand, encourages deep, drought-tolerant roots.
Should I mulch under my trees?
Yes. Grass growing under trees will intercept much of the water you apply, keeping it from reaching plant roots. It's best to keep a large (3' plus), turf-free circle around the trunk. A 2" to 3" layer of organic mulch, such as shredded bark or pine straw, helps conserve moisture and keeps weeds at bay. To prevent rot, don't pile mulch against the trunk.
Should I fertilize during a drought?
As a rule, drought-stressed trees should not be fertilized. When water supplies are limited, trees naturally slow their growth. Applying fertilizer can encourage a flush of growth that causes the tree to require more water than is available. And the salts in many fertilizers can harm drought-stressed roots.
Is the technique the same for those of us living in desert climates?
According to Phoenix-based author Cathy Cromell, in desert conditions irrigation should soak the soil at least 3' deep. "We have such salty water and salty soil; deep watering helps by leaching salts past the root zone. Salt burn is a very common here, especially with non-native trees." Deep irrigation also encourages roots to grow deeply, as opposed to frequent light watering which leads to shallow roots that are more vulnerable to drying out.

Take Steps to Minimize Tree Stress During Drought

  • Avoid digging under and around trees so you don't disturb the roots
  • Don't do any heavy pruning. However, it's OK to remove broken, dead, insect-infested or diseased branches.
  • Keep an eye out for insect pests and disease, because drought-stressed trees are more vulnerable to attack.
  • Avoid using high-nitrogen lawn fertilizers under trees, and never use weed-and-feed products, which can harm tree roots.

Watering Restrictions

Even if your municipality imposes watering restrictions, it's likely you'll be able to properly water trees. If you must choose between turf and trees, remember that trees are a bigger investment. And it will take years, if not decades, for a newly planted tree to take the place of a mature tree that has been lost to drought.

Nothing beats a David Austin English Rose. Great blooms, disease resistant, and repeat blooming.


Nothing beats a David Austin English Rose. Great blooms, disease resistant, and repeat blooming.

www.wwnursery.com