Saturday, December 19, 2015

There's no better way to get in the holiday spirit than to experience our magical lightshow @tiogadowns! #tdcwinterfest #HappyHolidays #simplyhavingawonderfulchristmastime


There's no better way to get in the holiday spirit than to experience our magical lightshow @tiogadowns! #tdcwinterfest #HappyHolidays #simplyhavingawonderfulchristmastime

www.wwnursery.com

Looking for awesome gifts for the gardeners in your life? Check out this list of our favorite items. ow.ly/W7h9r #LetsGrowGreenTogether #gift #ideas


Looking for awesome gifts for the gardeners in your life? Check out this list of our favorite items. ow.ly/W7h9r #LetsGrowGreenTogether #gift #ideas

www.wwnursery.com

Great Gifts for Gardeners of All Ages

For the Adult Gardener in Your Life 

WW Manufacturing Square Spade -  Bar nun the greatest spade on the planet. You can do anything with it!

A new pair of gloves.  We at W&W would expect last year's gloves to be worn out and pockmarked with rips and holes. 


A pond kit. Water features have become a staple in American gardens. What better way to help local wildlife (and your soul) than to put in a pond or waterfall.


A pair of Felco pruners. Felco is the pinnacle pruner. We use it everyday at W&W. No other brand can match its durability. Seriously, It will be the last pruner you buy. 


A nice arrangement of pots to accent and enhance the garden.


For the Young Gardener in Your Life

A pair of muck boots, so the kids can play in the garden this spring and not get covered in mud. 


A small wheelbarrow. A little help goes a looooong way with a child's imagination. Give them memories of working hard in the garden, and hopefully create memories that will be there for a lifetime.


Kid's shovel. The essential tool for any gardener, no matter how old they are.


Give them the opportunity to make their own little garden. Give them a space that allows them to create and get dirty. 


A packet of seeds, so they can see the magic of nature growing before their eyes.

Tuesday, December 8, 2015

As seen @bellingrathgardens #MagicChristmas in #Lights event: The #4thbiggest #lightshow in the #USA! Can't wait to see the rest! #staytuned for #updates


As seen @bellingrathgardens #MagicChristmas in #Lights event: The #4thbiggest #lightshow in the #USA! Can't wait to see the rest! #staytuned for #updates

www.wwnursery.com

Poinsettia Care - Shopping Tips

Here are some items to consider while making your poinsettia selection:


Avoid plants with foliage that is beginning to yellow. The actual flowers of the poinsettia are the golden yellow clusters (cyathia) in the center of the colored bracts. The colored bracts are actually the plant’s leaves that change color to attract pollinators. When you choose your poinsettia, make sure the plant you choose still has the bright golden yellow clusters in the center.

Avoid purchasing poinsettias that have been left in the plastic wrapping. This could cause the leaves to yellow and drop before the holiday season is over. 
Seen at the 4th Best Christmas light display in the country.

A protective sleeve should be placed on the plant to shelter it from cold temperatures on its way from the store to home. The poinsettia should be taken home and unwrapped as soon as possible. Leaving the plant in an unheated car while you continue to shop will cause cold injury. 


Sunday, November 22, 2015

DIY Thanksgiving Table Decorations


If you're thinking about how to decorate your table for Thanksgiving, look no further than your own backyard. Decorating your table with natural elements will give your table the perfect rustic look you've seen in the magazines. 


Have your kids help you by collecting as many pine cones and acorns as they can find and fill a bowl or a tall glass vase.
On the day of your celebration, look for freshly fallen leaves that still have their beautiful color. For the finishing touch, add a couple tea light candles to illuminate your beautiful centerpieces.


Thursday, November 12, 2015

Planting Hardy Bulbs in Containers for Indoor Blooms

Choose a pot of the desired size for planting your bulbs. Although most sizes will work, a 6– to 8–inch pot will give your bulbs enough growing room. If the pot has no drainage hole, place a one-inch drainage layer in the bottom of the pot. Use gravel, stones or perlite. Add sufficient potting mix so the tips of the bulbs will be even with the top of the pot. Arrange the bulbs on top with the pointed ends facing up.

Cover the bulbs with more potting mix to with- in 1/4” of the pot lip. The tips of the bulbs should be visible. Water the bulbs and move the container to a cool area such as a shed or unheated garage, or the refrigerator. The bulbs require 13 weeks at 35–48 degrees Fahrenheit. Water as needed. In a few months, you’ll begin to see signs of growth. At this point, bring the container indoors and water regularly. Place in bright light until flowers show color (3–4 weeks). Once color is visible, move to bright indirect light. Soon you’ll be rewarded with beautiful blooms.

If you’re preparing a container of flowering bulbs to place on your deck or patio, keep the container in a garage or a basement where the temperature stays around 35–40 degrees Fahrenheit. A cold frame can also be used. If kept outside, the bulbs will be subjected to a damaging freeze/thaw cycle. In March you can safely place your container of bulbs in their outdoor location and enjoy the emerging spring color.

Monday, November 2, 2015

November Garden Tasks

Vegetable Garden 

  • Clean out old plants and compost including Asparagus beds as the fronds fade. Harvest Jerusalem artichokes, broccoli, radishes, peas, parsnips, lettuce, leeks, potatoes, kale, collards, celery, cauliflower, cabbage and Brussels sprouts.
  • Prepare beds for early plantings of peas this allows for an earlier planting in the spring before the soil dries out enough to be worked.
  • Plant Fava beans (cover crops can double as a source of beans for the table), garlic, onions, rhubarb and artichokes.
  • Prune the fruiting top sections of evergreen raspberries once they finish producing fruit and leave the lower section of branch for next years early crop. Other raspberries can be topped off at 5 feet and staked.
  • Store your bounty by freezing canning or hanging in a cool garage.

Flower Garden

  • Plant pansies outdoors now and enjoy the flowers until late spring. Mound soil or leaves around the base of hybrid teas and other grafted roses to protect the graft union from frost.
  • Prune rampant suckers from the base of lilacs which will take away from next years bloom.
  • Prepare and plant wildflower bed and broadcast seeds. This can be done in the spring as well but you can get a head start now and focus on other tasks come spring.

General Landscaping 

  • Prepare open beds in the flower and vegetable garden with organic matter and organic fertilizers. Chopped leaves, peat moss or compost can be added now to improve the soil’s humus levels. This improves the structure, drainage and nutrient holding capacity of your soil. For established beds work in organic matter and fertilizers around the plants and cultivate them into the to few inches of soil.
  • Mow lawn to 1.5 to 2 inches for the winter This keeps the lawn healthy and prevents the lawn from matting down.
  • Keep leaves and compost or make a dedicated leaf mold pile for future mulch unless they are from allelopathic trees (producing chemicals that inhibit other species growth) like the genera Juglans (e.g. Black Walnut or Aesculus (e.g. Horse Chestnut).
  • Drain and clean man made pools and ponds. Remove tropical plants and store hardy lilies.
  • Very last call for planting trees and shrubs including woody fruiting plants.

Friday, October 30, 2015

Meet the Corpse Plant: Smelliest Plant Ever!

One of the world’s largest and rarest flowering structures, the corpse flower is a pungent plant that blooms rarely and only for a short time. While it is in bloom, the flower emits a strong odor similar to rotting meat or, aptly, a decaying corpse.
There is a good reason for the plant's strong odor. “It all comes down to science," said Tim Pollak, outdoor floriculturist at the Chicago Botanic Garden. "The smell, color and even temperature of corpse flowers are meant to attract pollinators and help ensure the continuation of the species.”
Pollak explained that dung beetles, flesh flies and other carnivorous insects are the primary pollinators of this type of flower. These insects typically eat dead flesh. The smell and the dark burgundy color of the corpse flower are meant to imitate a dead animal to attract these insects.
“Corpse flowers are also able to warm up to 98 degrees Fahrenheit (36.7 Celsius) to further fool the insects,” Pollak told Live Science. "The insects think the flower may be food, fly inside, realize there is nothing to eat, and fly off with pollen on their legs. This process ensures the ongoing pollination of the species. Once the flower has bloomed and pollination is complete, the flower collapses."

Sourcehttp://www.livescience.com/51947-corpse-flower-facts-about-the-smelly-plant.html

Thursday, October 29, 2015

Prevent Moss From Growing On Your Roof!

What is Moss?


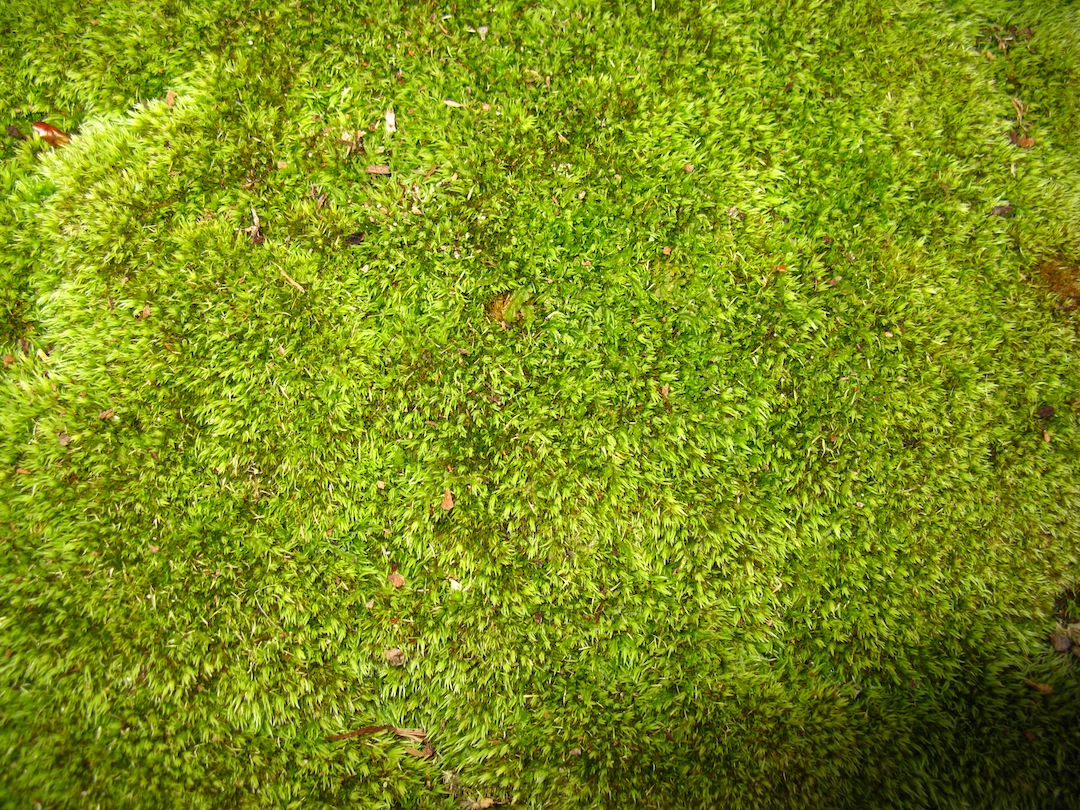
Moss is a plant species that grows really well in moist cool areas. There are many different species of moss. Some common characteristics among these species are that moss does not have flowers or seeds, they must have a damp environment to grow in because they do not have any root system to secure water, and they are usually extremely green with tiny leafs.


Why is Moss on The Roof Bad?

As the moss thickens and grows on an asphalt shingle roof it can raise the shingles up (much like a jack under a car). When the shingles get risen it allows water to go under the shingles causing the decking to rot and causing the roof to leak. The raised shingles also pose problems when heavy winds are present because they will catch the wind like a sail and this can cause shingles to be torn/blown off the roof.


A moss buildup on the roof causes more debris to get trapped on the roof. This debris promotes water buildup which makes the roof at risk of much more rotting and leaking.
Moss can actually damage the asphalt shingle components leaving it to break down faster.


How to Prevent Moss


Remove the Shade

Because moss grows well in shaded areas one way to control moss/remove it from roofs or other areas is to remove its shade. This can be done by removing trees, trimming tree branches to allow more sun to penetrate, or remove bushes and other type of plant life that may be blocking the sun.

This method of moss prevention and removal is highly effective but remember that it may be ineffective if the weather is often overcast and cloudy.


How NOT to Get Rid of Moss

Roofs are an investment that must be safe guarded. That being said, we want to give you some “what not to do” tips when trying to remove moss off of your roof.


1. Do not pressure wash the moss off

By using a pressure washer to remove the moss you are going to dramatically reduce the life of your roof. How? The high powered water will remove the asphalt shingle granules which help protect the shingles and ensure a longer life span.


2. Be careful with using acids to remove moss. 

If your acidic mixture is too strong or stays on the roof too long, it can eat away at the shingles. If your roof cleaning solution has not been tested previously, make sure you test it on some spare shingles before applying it to your roof.


3. Do not scrape the moss off of the roof. 

This can rip, crack, and break the asphalt shingles themselves.


4. If any water is used to remove the moss, do not spray the water at an upward angle. 

If you do, this can cause water to go under the shingles and leak into the house or rot the wood decking of the roof.

Source: http://roofpedia.com/removing-moss-on-roofs/

Monday, October 26, 2015

Top 5 Must Do's Before Winter

With a little preventative maintenance in the fall your lawn and property will be in great shape in the spring. Here is a list of things you can do to make your life easier when things begin to get green again.

     
  1. The biggest chore in late autumn is getting the lawn ready for the winter season. You should mow your lawn right up to the time it quits growing in the late fall. The grass should be cut to a level of two inches at last cutting. A good sign it has quit growing is the absence of lawn clippings when you run the mower. If it is higher than two inches, winter winds and wet weather will flatten the grass, bending it over and causing it to retain moisture, which can lead to bacterial growth and mold, damaging the roots. If the grass is too short, the lawn will suffer from drying winter winds, and can be damaged by the sun. Always remove any leaves and debris from the lawn. Leaves left lying on your lawn all winter long can prevent water from reaching the grass, or will trap too much moisture. This causes the grass to rot and die before spring. 
  2. Now is the time to fertilize the lawn. Look for fertilizers high in nitrogen. You may also consider a fertilizer that is lower in nitrogen, but higher in phosphorus and potassium. By fertilizing in late fall, you will encourage lush growth in the spring. 
  3. Clean up the lawn mower. Wash and dry it, removing caked on dirt, lawn clippings, and grease. Remove any caked on grass from the mower deck, and inspect the blade for damage. Determine if it should be sharpened or replaced before spring. Putting you mower up on blocks during winter months is a good idea, also. It prevents flat spots from wearing in the rubber. 
  4. Be careful in pruning trees late in the year. Many ornamental trees such as azalea, dogwood, forsythia, redbud and rhododendron set their buds for blooms in the late fall, and pruning them can destroy next season's blooms. Do remove any obviously dead branches.
  5. Thoroughly drain all water hoses, coil them, and store in a dry area. if using a hose reel, insure that all water is drained from the hose to prevent freezing and cracking during cold weather.  
    Drain all faucets and valves, and turn off the water supply to them from the basement if you can. Turn over empty outside containers to prevent water collection and freezing, and store all birdbaths for the winter. 


Source: http://www.doityourself.com/stry/toptenthingstodo#b

Saturday, October 24, 2015

Winterizing Trees & Shrubs


Most shrubs and trees require no special preparation for winter, aside from making sure they are watered and old flower heads are removed.

Trees with smooth bark will benefit from tree wrap. Starting at the base of the tree, wrap the trunk to the lowest branch, overlapping each layer by 1/3. Secure at the top with duct tape or twine. Remove the tree wrap by the end of April.

Broadleaf evergreens, such as Holly and Rhododendron, can be sprayed with Wilt Pruf to prevent dissecation. Apply late in the season while temperatures are still above 40 degrees Fahrenheit. You can reapply mid-winter if there is a brief warm spell. Wilt Pruf can also by sprayed on any plant, with or without leaves, that is in a very windy location. Use with caution on plants with very fine needles (Hemlock, Arborvitae, Juniper); follow the product’s instructions on the label.

Plants sensitive to wind or sunburn can also be wrapped with burlap. Wrap in late fall and secure with twine or staples. Burlap can also be used to protect plants from deer and rabbits.

A-frame shrub protectors can be placed over plants that are under the drip line of your roof to protect them from snow or ice damage. They will also provide some protection from wind and sun.

Spray-on deer and rabbit repellants can be applied mid- to late fall. Follow the product’s instructions on the label for effective coverage.

A small group of shrubs require special winter care: Buddleia (Butterfly Bush), Caryopteris, Vitex (Chaste Tree), Scotch Broom, Big Leaf Hydrangeas (pink or blue flowering varieties). After the leaves have fallen from these plants, apply 12–18” at this time. Caryopteris, Scotch Broom and Hydrangeas can be cut back to green growth in the spring. The mulch should be removed in spring as the temperature warms.

The following plants are slow to start growing in the spring, so a little patience is required: Butterfly Bush, Caryopteris, Chaste Tree, Ornamental Grasses, Hardy Hibiscus.

Wednesday, October 7, 2015

Barberry Banned in NY State - Get Yours Now!


As of March 10, 2015 Barberry is on the list of invasive species in NY State. That means this season is the last chance to add some beautiful barberry to your landscape. 

Barberry is great because it's deer and rabbit resistant on account of its thorny exterior! Barberry does not play well with others and has a tendency to overpower other plants because of the chemical it emits. That being said, it's best to not try to place other plants near it. 

More about Barberry 


Growing barberry bushes is easy and many city dwellers choose this shrub type due to its ability to tolerate urban conditions much better than other varieties of landscape shrubs. They can even be grown in containers.

Barberries like full sun or partial shade and are very adaptable to a wide range of soil types as long as it drains well. Transplant barberries just after flowering or in late winter.
Barberry Shrub Care

When it comes to barberry shrub care, you’ll find that it’s pretty minimal. In fact, pruning barberry plants may be the most work performed with this shrub.

If you are keeping your barberry shrubs as a hedge, it is necessary to prune a couple of times a year. Pruning barberry plants increase shrub health and vigor. Prune for shape during the winter or fall after the plant has fruited. Remove dead wood during the summer and winter months.

A 3-inch layer of mulch helps with moisture retention.

Fertilizing barberry shrubs is generally not necessary.


Friday, September 11, 2015

9/11 Memorial and the Significance of the Trees Selected


Crews selected and harvested trees from within a 500-mile radius of the World Trade Center site, with additional ones coming from locations in Pennsylvania and near Washington, D.C. (Maryland), areas impacted on September 11, 2001.


Swamp white oaks (Quercus bicolor) were picked because of their durability and leaf color. In fall, the leaf color ranges from amber to a golden brown – and sometimes pink. The trees can grow to reach heights as tall as 60 feet in conditions similar to those on the plaza. The trees will never be identical, growing at different heights and changing leaves at different times, a physical reminder that they are living individuals.


All About Mums!

Location
Choose a location that gets at least six hours of sun a day. Plants that don’t get enough sunlight will be tall and leggy and produce fewer, smaller flowers.

Soil Preparation
Mums thrive in well-drained soil. Heavy clay soil should be amended. If your chosen location is soggy after the slightest rain, grow your mums in raised beds with friable soil for good root growth. If the soil is too dense, add compost and prepare to a depth of 8–12 inches. Gypsum or greensand can be added to loosen clay soils. Mum roots are shallow, and they don’t like competition. Plant mums about 1 inch deeper than they were in the nursery pot, being careful with the roots as you spread them.

Watering
Water newly planted mums thoroughly, and never let them wilt. Use Schultz Starter Plus to stimulate new root growth. After they are established, give mums about an inch of water per week. If bottom leaves look limp or start to turn brown, water more often. Avoid soaking the foliage, which encourages disease.

Fertilizer
Use a complete fertilizer such as Plant-Tone, Jack’s Classic All Purpose, Super Phosphate, or Osmocote, beginning in the spring when new growth appears. Follow the directions on the label as to frequency of application. Fertilize through August.

Overwintering
Prepare mums for winter after the tops have turned brown. Mulch up to 4 inches with straw or shredded hardwood. Fill in around the entire plant, spreading well between the branches. Pinch off dead blooms to clean up the plant but leave branches intact. Mums have a better chance of surviving if you wait to prune old stems until spring. As soon as the weather warms, pull away mulch to allow new shoots to pop up.

Dividing
Mums grown as perennials need to be divided every couple of years. Divide in the spring after the last hard frost and after you see new growth starting. Dig up the plant in one piece and separate outer pieces from the center with a clean, sharp spade or large knife. Replant the outer portions into a rejuvenated bed, and discard the original center of the plant.

Pests
You may notice aphids, leafhoppers, or spider mites, but they are not likely to harm the plant. Treat with an appropriate insecticide.

Pinching Mums for Better Bloom
The key to those full, rounded domes of blooms that you associate with mums is pinching to create more branching and keeping plants compact. Don’t hold back; just a few minutes here and there will reward you with a thick, solid-looking plant. If you’ve bought large, full plants in the fall, then they have already been pinched, and you don’t need to do anything except plant them. Young spring plants will need pinching for maximum bloom and best plant shape. In spring, start pinching as soon as you see a good flush of growth. Pinch about 1 inch of tender new growth at the top of the shoot. Repeat the process with every 3–5” of growth (about every two to four weeks) until July 4th. Stopping then ensures you will get good bud formation and blooms in the fall.

Monday, August 31, 2015

About Globe Blue Spruce


Height: 5 feet
Spread: 5 feet
Sunlight:  Full Sun/ Partial Shade
Hardiness Zone: 2
Other Names: Blue Colorado Spruce;Colorado Blue Spruce

Description:
A small, dense globe-shaped shrub, very unlike the species, as a mounded form that eventually becomes a compact and dense Christmas tree-like shape, adaptable and hardy; intensely blue needles, an excellent choice for form and color in the garden

Ornamental Features:
Dwarf Globe Blue Spruce has attractive blue foliage which emerges silvery blue in spring. The needles are ornamentally significant but remain blue through the winter. Neither the flowers nor the fruit are ornamentally significant. The rough gray bark is not particularly outstanding.

Landscape Attributes:
Dwarf Globe Blue Spruce is a dense multi-stemmed evergreen shrub with a distinctive and refined pyramidal form. Its relatively fine texture sets it apart from other landscape plants with less refined foliage.
This is a high maintenance shrub that will require regular care and upkeep. When pruning is necessary, it is recommended to only trim back the new growth of the current season, other than to remove any dieback. Deer don't particularly care for this plant and will usually leave it alone in favor of tastier treats. It has no significant negative characteristics.
Dwarf Globe Blue Spruce is recommended for the following landscape applications;
  • Vertical Accent
  • General Garden Use

Plant Characteristics:
Dwarf Globe Blue Spruce will grow to be about 5 feet tall at maturity, with a spread of 5 feet. It tends to fill out right to the ground and therefore doesn't necessarily require facer plants in front, and is suitable for planting under power lines. It grows at a slow rate, and under ideal conditions can be expected to live for 60 years or more.
This shrub does best in full sun to partial shade. It is very adaptable to both dry and moist growing conditions, but will not tolerate any standing water. It is not particular as to soil type or pH, and is able to handle environmental salt. It is highly tolerant of urban pollution and will even thrive in inner city environments.
This is a selection of a native North American species.

Monday, August 24, 2015

Press & Sun Bulletin - Nursery Owner Looks to keep Business Diverse


Ken Williams began mowing lawns as a teenager. Now, he owns a 57-acre nursery and landscaping business in Apalachin, with plants, produce, design services and landscaping crews.
In a recent interview, Williams, owner of W&W Nursery & Landscaping, discussed the challenges of running a small business, the art of gardening and why he’s proud to own “the place along the highway.”
QUESTION: How did W&W Nursery & Landscaping start?
ANSWER: I started mowing lawns at 13 just to make money. If I could push the mower to it, I could mow it. My first summer out of college, I bid a job for Hadco Corporation. They gave me a shot by hiring me and I turned around and invested back into the business. I just kept working. I had worked for another nursery for five years learning the trade.
I had done the landscaping for the previous owner of this farm. One day, I decided to plant a seed. I said, “If you ever want to sell, let me know.” The ground here is river-rich soil. It’s perfect for growing and it has a highway exposure. He accepted, and I moved from my old location on Gaskill Road (in Owego) to this facility in 2002 and opened to the public in 2005.
We’re family here. My nephew, Jeremy, is my operations manager. My wife works with the books. My son works part-time, he’s a nursery hand and does networking. My daughter is here full-time helping on the maintenance side. I never thought I’d see the day I had both of my kids on a job site with me.
We currently have 57 acres, 38 in production. We have 16 employees regularly; at our peak, we have 20. W&W Nursery and Landscaping is a full service nursery and garden center. We have hard goods, plants, mulches, tree shrubs, and we deliver. What sets us apart from the box stores is education and experience. This is all we do, and we grow it. Our product is acclimated; our trees are growing in the ground. That makes a big difference if it’s grown in the Southern Tier. We’re not always force-feeding consumers like the box stores. We grow a variety of trees, not just a few to pick from. We know our business and we can compete. Not to mention, our quality is better at W&W.
Q: How has your business evolved?
A: It all started with landscaping and maintenance. We didn’t like what was coming in from suppliers so we decided to start our own nursery because we wanted to control our own quality. I always knew I wanted to have my own nursery where I could grow my own to make me more competitive for larger projects. Also, I wanted to supply the do-it-yourself market because there’s a demand for good quality. That’s how it evolved.
We’ve had to diversify and be smart. We have to be innovative in order to keep things fresh. It’s not just setting plants out on the gravel or blacktop anymore. We have design & build and we’ve established a u-pick produce area. We grow trees, shrubs, annuals, perennials, vegetables and fruit trees, and we have our crews out doing work. It all fits together. After all, gardening is a lifestyle.
Q: What are some of the challenges of doing business here?
A: I started my company in 1988 with just ambition, mowing lawns. I built it. I had some gifts from God along the way, and I knew how to run with it, so I feel I’ve paid my dues. The cost of doing business and the challenges in New York State have so far exceeded when we started. As we’re coming into our 28th year, I’m thankful to be established. If I were a new business, just starting, I wouldn’t do it in this state. Between taxes, utilities, and regulations, costs are getting out of hand. We feel we’re working twice as hard for the same outcome.
In order to overcome some of our challenges, we capitalize on selling to retail and wholesale customers. We’re supplying up the East Coast: municipalities, golf courses, universities, garden centers, and even landscapers. In fact, we have over 300 landscapers on our mailing list. That’s really what’s starting to grow for us.
Q: Do you think the proposed minimum wage hike for employees of the fast-food industry will have an impact on business?
A: Absolutely and for us to a point. People that work for us enjoy this trade. I feel business will either close, move or create self-checkout to eliminate people, which will in turn create more sterile environments. So I ask — is this the state doing this to fix our broken welfare system? The people that work part-time and get assistance now will be at a higher income so they lose assistance? Time will tell.
We’re facing a lot of challenges like all businesses. We’ve diversified. It’s important to count your blessings and keep moving forward.
Q: What steps have you taken to help your business overcome those challenges?
A: I started with a video series in 2010 (Street Smart Gardener TM). It’s one of those ideas that just snowballed. We did it because we wanted the do-it-yourself individuals to feel comfortable about gardening. I’m trying to get younger generations to come in and garden too. We want to show that they can grow a vegetable garden just like anybody else, and we’re here to help. We had to adapt and diversify to bring those people in.
Five years ago is when I decided to start pushing gardening as a lifestyle. We want people to get back outside with nature a little bit so they can slow down and appreciate things more.
We’re willing to invest in ourselves and for our customers to make things easier. We have a full-time social media employee for FacebookYouTubePinterest, Instagram, and our blogs. Social Media is fun because it enables us to more easily connect with customers. We’re also launching our new website sometime in the next few weeks, which will be mobile-friendly and make it easier for our customers to keep up with us.
We also offer virtual imaging for landscape design through our in-house landscape design department. It assists us with estimating so when we know the exact square footage of a property, we know how much of everything you’ll need. If you don’t know plant life, it’s hard to visualize. We’ve always done computer imaging, but we always try to stay fresh and at the forefront of the software that’s available. Now we’re able to let our clients see our vision for their property up close.
Q: What changes are ahead for your business?
A: We’ve really increased our vegetables and fruits. We’re going to line up 1,000 apple trees for a u-pick orchard. We’re doing 10 varieties of tomatoes: half the price of the grocery store, and you can pick it when you want it. This is a new endeavor for us in an effort to diversify what we offer. Staying fresh and moving forward is key. We refuse to get stale and in doing so, we’ve created a destination here.
Yes, we’re “that place along the highway.” I’m thankful to be by the highway. We have 57,000 cars a day that go by. People from all over find us.
Beyond the u-pick produce, we’re going to do hops for the microbreweries. In an effort to keep our employees on the books longer throughout the year, I created an Animated Holiday lighting service to keep them working through the late fall. And we’ve got something new in store for next year, but I think I’ll just let our competitors keep guessing as to what that might be.
Q: What trends do you see in this line of work?
A: Definitely vegetable gardening has become popular. Homes and apartments with raised beds are getting more popular, because it’s simple, anybody can do it and produce good crops in the comfort of their own property.
For what it’s worth, I’d recommend any new gardener to keep it simple. As a society, we’re always racing against the clock, so only take on what you can manage.
The outdoor living room concept has really been good for us. We’ve been doing a lot of fire pits and built-in grills; it’s basically like an extension of the house. People can go out and enjoy it, cook, get some herbs from their garden, pick their own produce and use them immediately.
Q: What’s difficult about your job?
A: This life is physically demanding, and it’s not for everyone. I’m very thankful, and I thank God for everything. I count my blessings for what we have. We’re dealing with more regulations. We worry about ticks, it’s hot, it rains … a lot, and it’s humid. But we’re outside, we get to work in nature and we get to meet a lot of great people. We get 10,000 people coming through here in the spring.
We’re all plant geeks here. We love seeing what’s new, especially all the different plant types, seeing how they’re going to work up here. I love traveling to other nurseries and going to trade shows out west. I’ve learned a lot from my peers. This industry has introduced me to a bunch of great friends and colleagues.
Nobody can predict the future, only the man upstairs. You just work at it. I’m thankful for what we have and where we are. We’re the only place like ours locally. We’re unique.
Q: Why is gardening important?
A: Gardening is an art — The art of expressing a thought with plants. Design is key. You have to be creative. There are a lot of advantages to thoughtful landscaping: storm water runoff, shading for energy, wind blocks for winter winds. Landscaping and gardening is really a necessity, not a luxury. We have a responsibility to protect the planet. It’s important that when you do building that you remember what was there before, so that you can put the proper amount of green space back in to protect the planet. That’s why I really like what I do. I know I am making a difference.
Follow Katie Sullivan on Twitter @ByKatieSullivan.
Kenny Williams
Business and title: The Street Smart Gardener, President W & W Nursery
Age: 45
Home: Apalachin
Hometown: Owego
Education: environmental design, Broome Community College
Hobbies: golf, musician and gardening
Family: wife, Sandy; son, Ryan; daughter, Aleah
Where to find him:wwnursery.com, on Facebook and YouTube
Photo Credit: Andrew Thayer

Tuesday, August 18, 2015

Time to Divide Your Peonies!


Now is a good time to divide peonies. 

If you have been moving things around in your garden and have some peonies, you might wonder if you find the little tubers left behind, can you plant them and expect them to grow. The answer is yes, but there is an appropriate way of propagating peony plants that you should follow if you expect to be successful.

How to Propagate Peonies

If you have been considering propagating peony plants, you should know there are some important steps to follow. The only way to multiply peony plants is to divide peonies. This might sound complicated, but it’s not.

First, you need to use a sharp spade and dig around the peony plant. Be very careful not to damage the roots. You want to be sure to dig up as much of the root as possible.

Once you have the roots out of the ground, rinse them vigorously with the hose so they are clean and you can actually see what you have. What you are looking for are the crown buds. These will actually be the part that comes through the ground after planting and forms a new peony plant when you divide peonies.


After rinsing, you should leave the roots in the shade so they soften up a bit. They will be easier to cut. When you are propagating peony plants, you should use a strong knife and cut the roots all the way back to only about six inches from the crown. Again, this is because the crown grows into the peony and dividing peony plants requires a crown on each piece you plant.

You will want to make sure each piece has at least one crown bud. Three visible crown buds is best. However, at least one will do. You will continue to divide peonies until you have as many peonies as you can get from the roots you originally dug up.

Plant the pieces in a location suitable for growing peonies. Make sure the buds on the pieces are not more than 2 inches under the soil or they may have trouble growing. If the temperatures are fairly even, you can actually store your pieces in peat moss until you are ready to plant them on a warmer day. Don’t store them too long or they may dry out and won’t grow. 


So now you know that propagating peony plants isn’t too terribly difficult, and so long as you have one good peony plant to dig up, you can be dividing peony plants and create many in no time.


Sunday, August 16, 2015

Sumac Tea is Rich in Vitamin C


Have you noticed this tree around your neighborhood? Well its red blossoms are ready to harvest. This is a sumac tree, not the poisonous kind, but the kind that makes a delicious tea full of essential vitamin C.


HOW TO MAKE SUMAC TEA
  • Pick 3-5 bright red berry clusters on a dry day and crush lightly with your hands. 
  • Put the berries in a pitcher and fill with cold water. 
  • Let the berries infuse for anywhere between a couple hours to a couple days depending on your taste. 
  • Strain through a coffee filter or cheese cloth as some varieties of sumac have irritating, tiny hairs that you'd rather not ingest. (A coffee press or french press is a great investment as it has a strainer built in) 
  • Once your tea is strained, sip and enjoy one of the best pink lemonades ever!

SUMAC REMEDIES

The sumac berries are full of natural vitamin C. That is the reason you use only cold water to make sumac berry-ade as hot water destroys the vitamin C.

American Indians knew sumac was full of the natural c vitamin and used it to treat colds, fever and scurvy. They also used the ground berries mixed with clay as a poultice on open sores and wounds. Native Americans also mixed the dried sumac berries with tobacco to smoke in peace pipes!

Sumac has also been used for diarrhea, dysentery, sore throats, infections, asthma, cold sores and even as a general tonic. You can even make sumac wine or a sumac tincture if you are so inclined.

Sumac is not only a useful plant but is an exceptionally beautiful red in the fall!

Source: http://www.healing-from-home-remedies.com/sumac-tea.html

Thursday, August 6, 2015

Woman's Land Army of America in WWI


The creation of the Woman's Land Army of America in WWI enabled nearly 20,000 urban women to enter America's agricultural sector to work as ordinary wage laborers between 1917 and 1921. The active recruitment of urban women into a government-sanctioned, formally-organized, and (largely) female-managed workforce to labor in physically demanding tasks such as sowing and harvesting, was a revolutionary and - to some – a disconcerting idea.


That these women were also young, college-educated, and lived in community with other like-minded women outside the authority of men challenged traditional stereotypes relating to women's role and work all the more. The relationship to gardening? The WLAA's work began at the Pennsylvania School of Horticulture for Women at Ambler (now part of Temple University).


Check out the source link for more information. 

Source: http://ucanr.edu/sites/thevictorygrower/Historical_Models/Womans_Land_Army_of_America,_ca_WWI/